
Matters
Creating a matter (with conflict check), finding a matter, the matter tabs, and closing a matter.
Nederlandse versie: /handleiding/dossiers
What is this? A matter (“dossier”) is the legal case you handle for a client, from intake to resolution. Almost everything in Basenet — an email, a document, a time entry, an invoice — belongs to a matter. The matter overview is where it all comes together.
How to create a matter
See the whole flow, including the conflict check, in action:
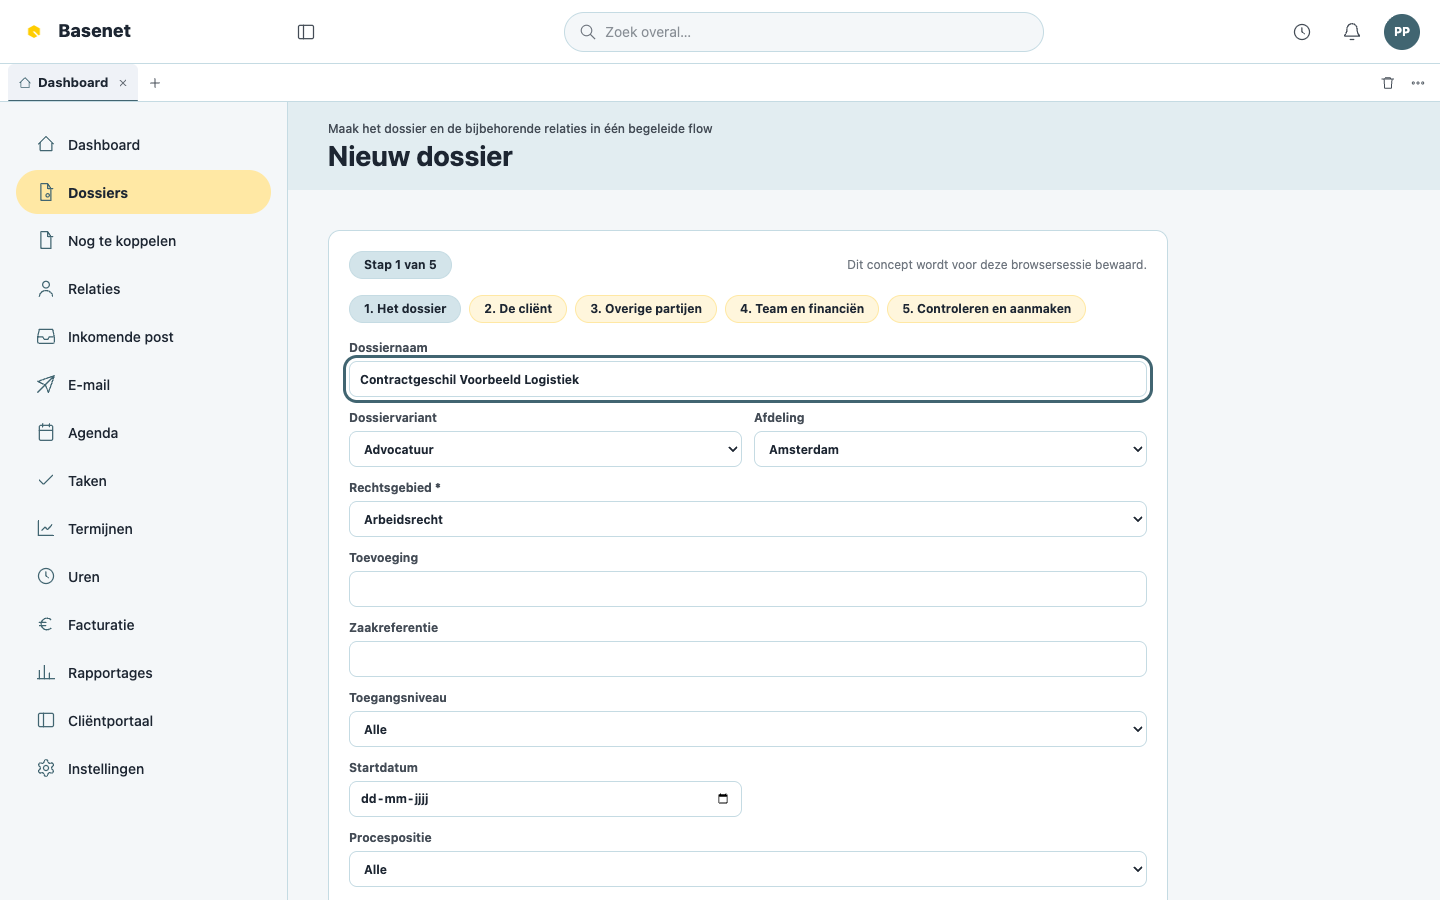
- Click Matters in the left rail, then New matter. The five-step wizard opens as a full page. Its draft is saved for this browser session per user and firm, so a reload resumes where you left off.
- Under The matter, enter the matter name, matter type, practice area, department, access level, start date, client reference, and any alert comment. The matter type controls which additional variant fields appear. Click Next.
- Under The client, choose an existing relation. If the client does not exist, create a company, person, or contact inline without leaving the wizard. A company can include the KvK/CreditDevice lookup, compliance check, and Wwft acceptance. An external screening that actually ran is the one exception to the draft rule: because the call can be billable, its result remains recorded if you leave the wizard.
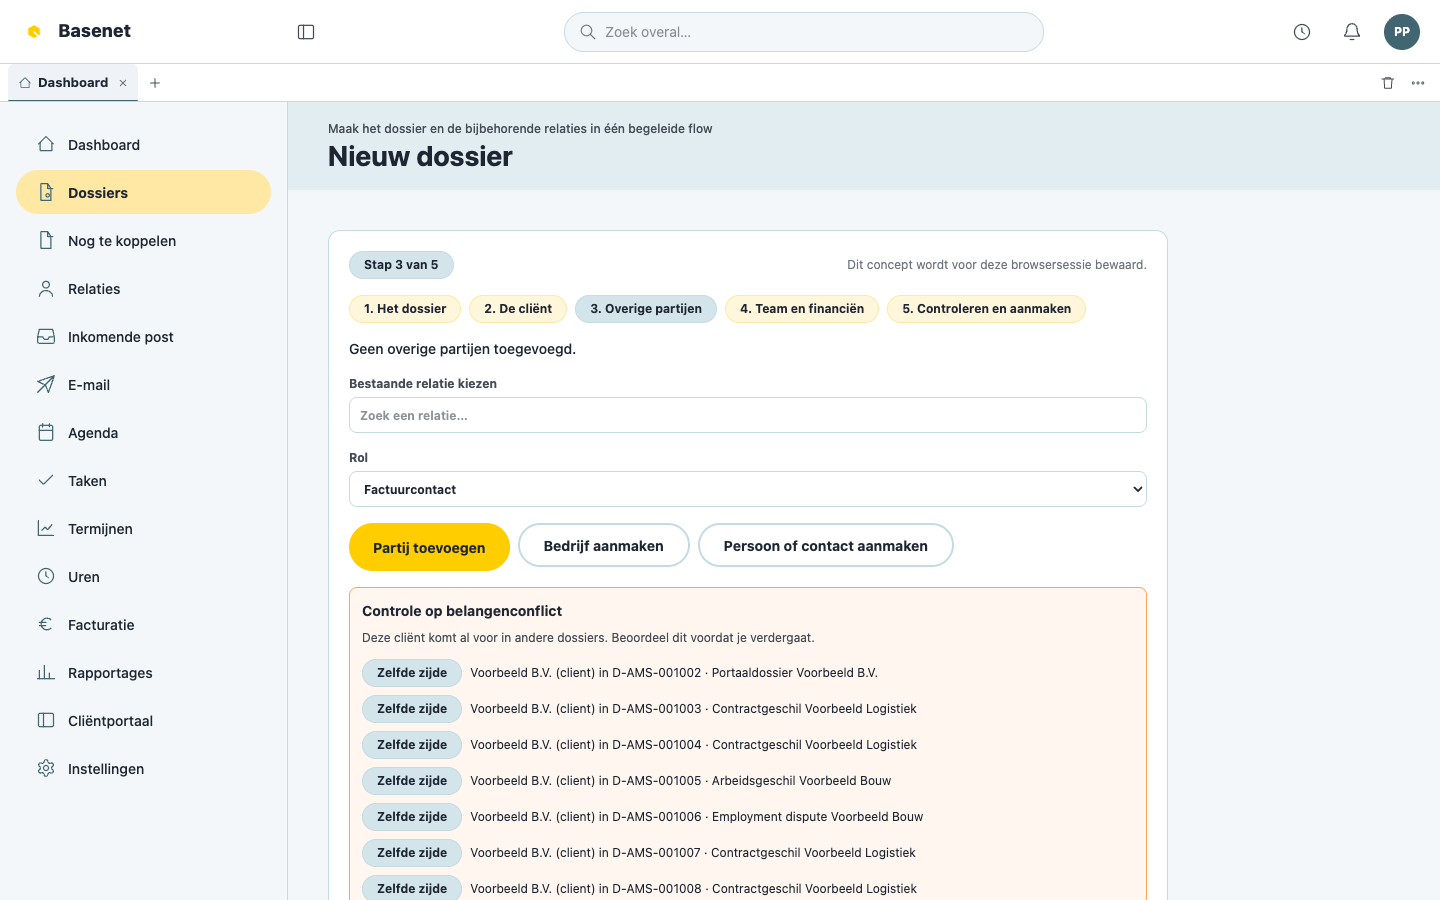
- Under Other parties, optionally add any number of involved relations and choose a role for each one. You can select an existing relation or prepare a new one inline. This step can be skipped.
- Under Team and financials, optionally choose the responsible and assigned solicitors and enter a financial agreement: hourly, fixed fee, or other, with the rate or amount and a different invoice recipient if needed. This step can also be skipped; the existing rate-resolution rules remain authoritative.
- Under Review and create, inspect the complete draft and click Create matter. Only then does Basenet create the new relations, matter, parties, and financial agreement together. If any part fails, none of that creation is saved.
For an existing client, use the fast route: enter the matter, select the client, and create from the review. You do not have to visit the optional steps.
Conflict-of-interest check
The conflict check runs again when you add the client or another party, and once more immediately before final creation. This also surfaces a new conflict that appeared while you were completing the wizard. For every matching matter, you see whether the relation was on the opposing or same side.
- Review the matters found.
- Tick I have reviewed these conflicts and want to continue.
- Enter the required Reason for proceeding. Basenet records the acknowledgement and reason in the audit history.
- Continue to review, or click Create matter there.
How to find a matter
- Type the client name or matter number in the search field “Zoek overal…” in the top bar, or
- open “Dossiers” and filter the list (columns such as “Status”, “Rechtsgebied”, “Afdeling”, “Verantwoordelijke”). Use “Weergave opslaan” (save view) to keep a frequently used filter combination.
- Click the matter to open it.
The matter tabs
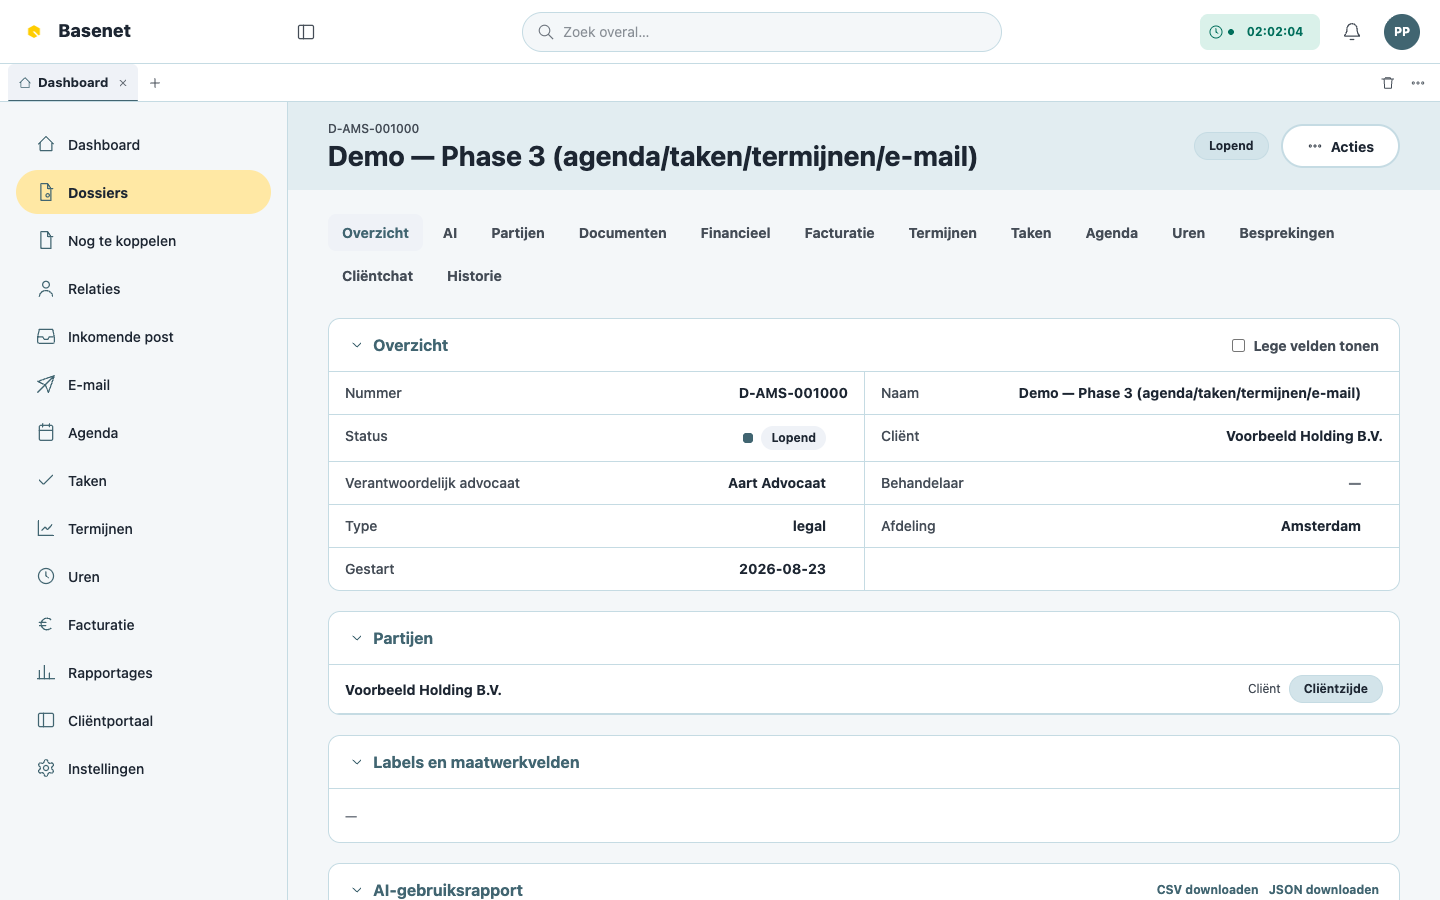
Every matter has fixed tabs. Everything belonging to the case is filed under one of them:
| Tab (on screen) | What you do there |
|---|---|
| “Overzicht” | Basic details (Status, Type, Rechtsgebied, Verantwoordelijke), recent activity, e-signatures, labels, and custom fields. An “Aandachtspunt” (alert note) appears prominently here. |
| “AI-assistent” | Ask questions about the matter, with cited sources. Only present if the firm enabled this AI feature. |
| “Partijen” | Who’s involved: client, opposing party or counsel, court, insurer, expert. Add with “Partij toevoegen”; every party has a “Rol” (role). |
| “Documenten” | The matter’s document management — see Documents & email. |
| “Financieel” | The “Financiële afspraak” (financial agreement): rates, fixed fee, advance, invoice splits, and legal aid (“toevoeging”). |
| “Facturatie” | Billing queue and invoices for this matter — see Time & billing. |
| “Termijnen” | This matter’s deadlines — see Deadlines. |
| “Taken” | Tasks linked to this matter. |
| “Agenda” | Appointments for this matter, with “Openen in agenda” (open in calendar). |
| “Uren” | All hours on this matter, with “Mijn urenstaat openen” (open my hours sheet). |
| “Besprekingen” | Internal discussion threads about the case. Start one with “Nieuwe bespreking”; mention colleagues with @email. Save a thread with “Opslaan in documenten”. |
| “Cliëntchat” | Conversation with the client: “Berichten hier zijn voor de cliënt zichtbaar in het portaal.” (Messages here are visible to the client in the portal.) Send with “Naar cliënt sturen”. |
| “Historie” | Who changed what, and when. |
How to change status or close a matter
- Open the matter and click “Status wijzigen” (change status) (or directly “Dossier sluiten”, close matter).
- On closing, Basenet checks for blocking items — for example unbilled hours or open deadlines: “Los deze op of bevestig ze voordat je sluit.” (Resolve these or confirm them before you close.)
- Once everything is resolved or deliberately acknowledged, click “Sluiten bevestigen” (confirm close).
How to edit matter details
- Open the matter and choose “Acties → Dossier bewerken” (actions → edit matter).
- Adjust fields such as “Cliëntreferentie” (client reference), “Notities” (notes), “Labels”, or the “Aandachtsmelding” (alert note — “Wordt prominent getoond wanneer het dossier wordt geopend”, shown prominently when the matter is opened).
- Click “Wijzigingen opslaan” (save changes).
The overview hides empty optional fields while keeping core information, such as number, name, status and responsible lawyer, visible. “Lege velden tonen” (show empty fields) reveals the empty fields. This preference is remembered for your user and also applies to relation details.
Edit mode displays all applicable fields on the same page, including matter-type and firm-defined custom fields. “Annuleren” (cancel) and “Wijzigingen opslaan” are at the top of the form. To change one value, use its pencil in the overview and choose “Opslaan” or “Annuleren” there. Reveal hidden empty fields with the toggle before editing them inline.